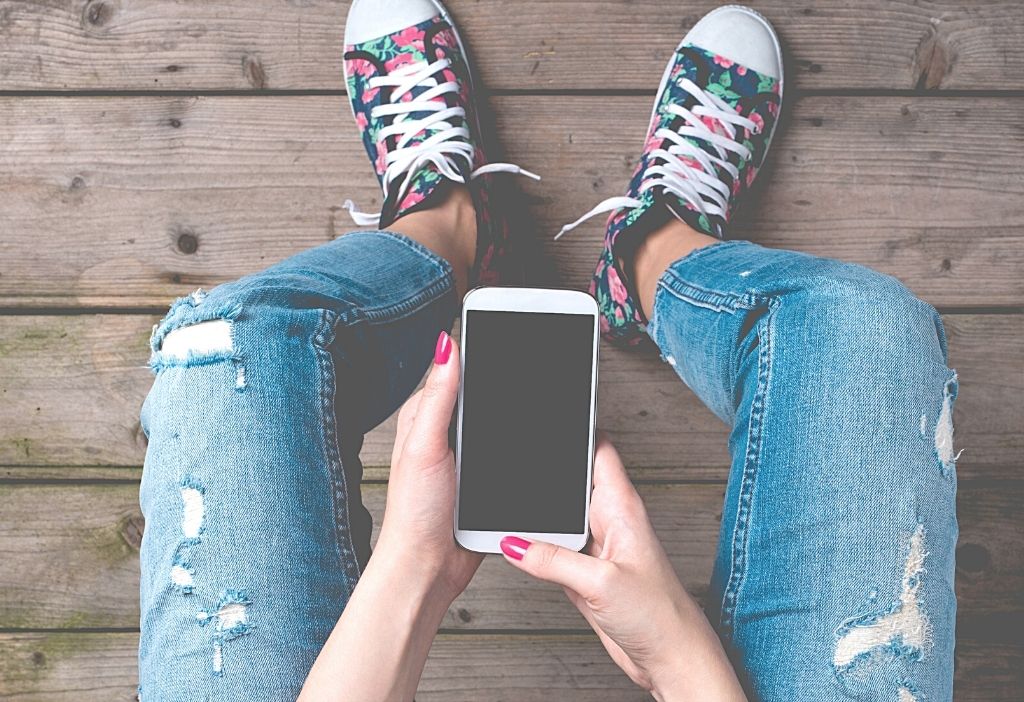
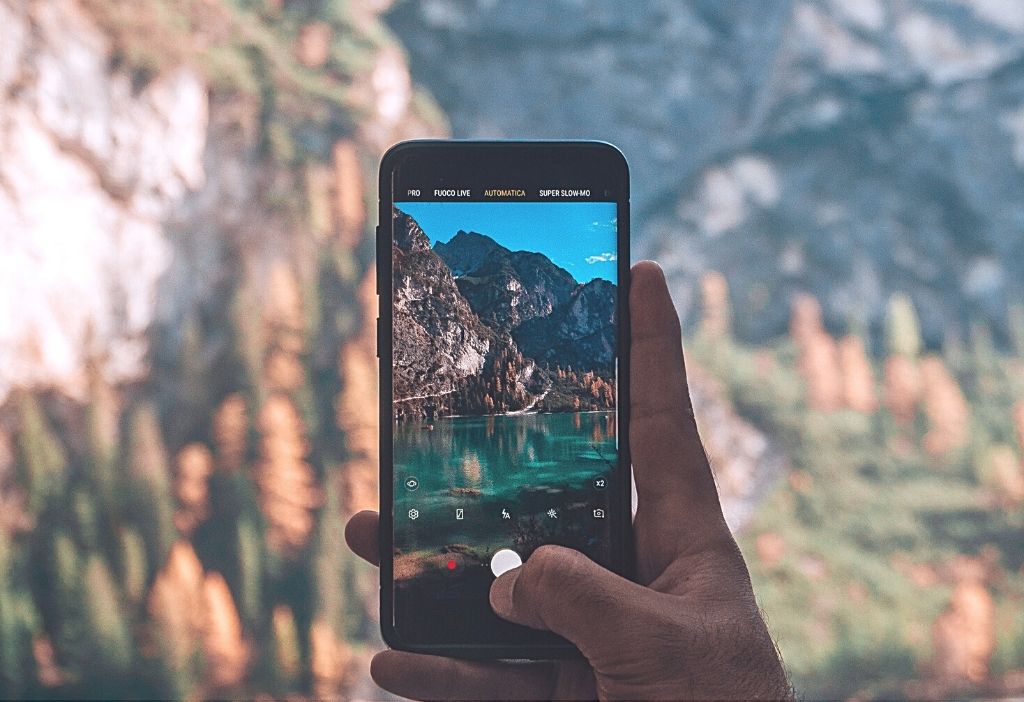
With the camera in your phone, you’re always ready to take a picture. Learn from these professionals how to improve your smartphone photography skills so you can always capture memories and important moments! Smartphones are increasingly becoming the most popular camera for photographers of all skill levels. The high image and video quality makes it easy to take high-quality photos with your phone wherever you are. That’s what makes this type of photography perfect, whether you’re a professional or a hobby photographer! Smartphones are great for quick, easy-to-access photos that you can take with you wherever you go. But don’t be discouraged if you don’t always get good results with your phone camera! It depends on how the photographer takes his shots, not just what device he is using at the time of taking the picture. Here are some tips on how to do this.

Mobile phones vs. DSLRs
We all know that the quality of a camera determines the success or failure of an image, but did you know that it’s almost irrelevant now? As smartphone manufacturers are making more and more progress in this area, there is less and less difference between their products and DSLR cameras.
DSLRs offer the best performance and setting options for taking photos, even high-end smartphones can’t keep up with their performance. Features like higher megapixel resolution or manually adjusting settings to create effects are things that cell phones lack compared to DSLR cameras.
But there’s no reason to overlook your smartphone as a powerful camera. You make up for what setting options you lose through convenience and ease of use. Cell phones are also great tools to help you get used to daily photography, so you’ll become a better photographer over time!
Smartphones are great for taking photos that you can instantly access and share with friends, family, or work colleagues. But don’t be discouraged if your phone camera doesn’t always deliver the best results! With the progress of smartphone manufacturers in this industry, the differences between their products and DSLR cameras are getting smaller and smaller.
Advantages of a smartphone camera
You only need a trouser pocket
Packing all your gear can be a hassle, especially when you’re traveling. It’s not just about weight; sometimes more mass means less space for other things like food or water! That’s why it can make sense to take your smartphone with you.
You go unseen
If you want to keep a low profile, a smaller camera is better. If you’re shooting on the street or want to stay incognito while filming, it’s much easier with your phone.
The right choice when buying a mobile phone
When you’re looking for a new phone, there are many different factors that go into the decision. One important factor is camera quality and whether the phone meets your needs for taking photos or videos.
Multiple lenses
When zooming in with your mobile phone, the image quality decreases significantly. That’s because it’s not possible to fit both telephoto and wide-angle lenses into such small devices without sacrificing battery life or other features. For this reason, several lenses are often installed. You should pay attention to this when you buy a cell phone.
The aperture
The aperture is the round hole in your lens that lets light through. A larger f-number, such as f/1.8, lets more light onto the lens you want to shoot. This means better low-light performance and a lower depth of field when using a phone with an open sensor!
Image stabilization
Some smartphones now have image stabilization, which can be used to prevent camera shake. This feature is particularly useful when you take photos in low light conditions and with a slow shutter speed.
The number of megapixels
When choosing the right smartphone camera, you should consider both the resolution and the number of megapixels. A high-resolution DSLR can record up to 60 megapixels, while most phones offer less than 20 megapixels, so if you want more detail or crop options, go for a higher pixel count!

Some tips to take better photos with your phone
Don’t get into too many details
To make the most of your phone’s limits, you need to know how it works. When there are fewer settings on a device, it can feel like something isn’t right, but in reality, it might just free up space for what’s really important. Limitations simplify things, which helps draw attention to the most important points. So use these simplifications creatively, because even if less means more when you design photos with simple tools.
Use what you have on hand
You can use grid lines in your camera app to capture better shots. The rule of thirds and HDR mode help you orient your shot according to these guidelines, so that all light and dark areas are evenly distributed on both sides for an accurate picture. If possible, try shooting at different times of the day when the contrast between the light sources is greater, because that will produce really nice results! Portrait mode could also be interesting for you, it mimics what faces with a shallow depth of field would look like by blurring them slightly and allowing us to focus purely instead.
Uncompressed file form
To get the best image quality possible, it’s important to use an uncompressed file format. This gives you more room for editing and can later edit your photos in software such as Adobe Photoshop Lightroom or competing options such as Instagram Stories.
Exercise, practice, practice
The smartphone is the perfect tool for anyone who wants to take photos in their everyday life. Whether you’re taking a selfie or just taking a few shots while you’re walking down the street, there’s no wrong way to go.
Conclusion: Don’t forget to edit your pictures!
With the mobile photo editing app Lightroom, you have your entire workflow in one place. From basic refinements to advanced tools like curves and repair brushes, you’re ready for anything! And when it’s time, you can share your finished photos on social media without ever having to upload them again.
Your equipment
The camera you use for your model and product photography can make a big difference to the success of the images. Your choice should be based on what kind of images inspires you the most and what budget is available to you! It’s important to stay up to date because technology is evolving every day and new models are constantly coming onto the market.
Distance between model and camera
The actual distance between the camera and the model should be carefully considered when taking photos. This allows you to capture better shots that look clear, detailed, and professional!
The aperture
There are no universal standards for aperture in fashion photography. Depending on what type of shoot you’re organizing – lookbook or product – the recommended aperture values change accordingly. Lookbook photography often requires a small aperture to achieve the perfect blur. A higher aperture helps you take sharper images, but it’s worth considering what type of shot you want to take and adjust it accordingly: lower if you don’t just want to highlight the products in an outfit or hairstyle; higher if you want to focus on details like makeup.
Which camera?
Which camera you use can affect the resolution of your final photos. Full-frame (FF) or APS-C sensors? The first question you should ask yourself is whether the photos are for personal use, such as a lookbook session where you want a higher level of detail; otherwise, consider a camera with a lower pixel density.
Help on site
With a professional, well-organized support team behind — assistants who take care of the models’ looks (hairdressers and make-up artists) as well as technical details such as production management, photographers can focus on creating beautiful photos. To ensure that your shoot is as productive and fulfilling as possible, you should have all the technical information ready about what you plan to do while shooting. Tell all assistants who can help you do this so they know how to best work with their assistant or director colleague. The order of the settings should also be communicated beforehand, which saves time if you have to figure out why something didn’t work afterwards!
Post-processing
Photographing models is about much more than just photographing them during the session. Although post-processing techniques differ depending on the type of photo, there are some general rules that apply to all types of photos – like keeping the overall goal in mind and making Photoshop adjustments when necessary to achieve the desired effect in the viewer. Keep your editing simple so you can keep the natural look of an image. If you make too many changes to a single photo, it could make people think they bought something else. So don’t overdo it with colors and intensity, because that can distract from the actual goal.
Conclusion: be prepared!
The factors that can lead to unexpected surprises in model photography are numerous and varied. Inadequate preparation, inadequacies in interpersonal communication, and improper use of equipment all contribute to disappointing images after the shoot. When you’re shooting models, it’s important to know where potential stumbling blocks lie so that you can develop your personal routine and save time. Keep an eye on mistakes to draw as many positive conclusions from the experience as possible. As skill increases, time-consuming experiments will eventually lead you to be able to efficiently manage product sessions or lookbooks.